Sunday, November 20, 2011

CRAFTY SUNDAY INSPIRATION

Continuing my new Sunday series of inspiration I have gleaned throughout the week, and things I just plain LOVE.

Stephen King. He's the Man.  He owns his craft.


I'm  a very long time fan of Stephen King, I never have one or two of his books far from hand. And in the last few weeks I have discovered Stephen King audio books. Ooo wee..now I can take Stephen along for the ride with me in the car, Stephen is with me whilst I do the mundane chores around the house ( he helped me clean the oven the other day). Stephen makes an otherwise dull trip to the Big Smoke more manageable ( The Gingerbread Girl)  and although the kids and hubby yell at me to turn the ipod down ( apparently they can hear it too? ) a day out in the car with Stephen King and and my crochet and I'm in rapture.


And of course with Christmas coming up quick, my thoughts have turned a wee bit Festive...

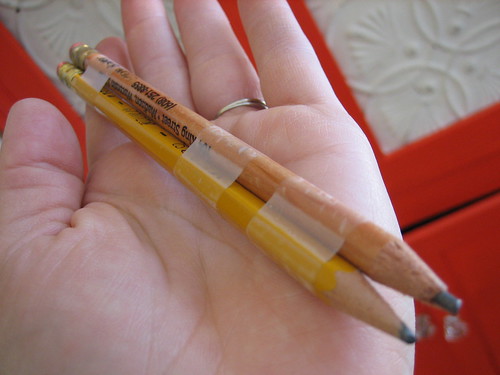
Love this bookmark from Simple and Handmade

 Love these pinecone trees from Mom Tatstic

 Make your own snow cones with ArtyAnts.

And CRAFTYNESS you can eat...

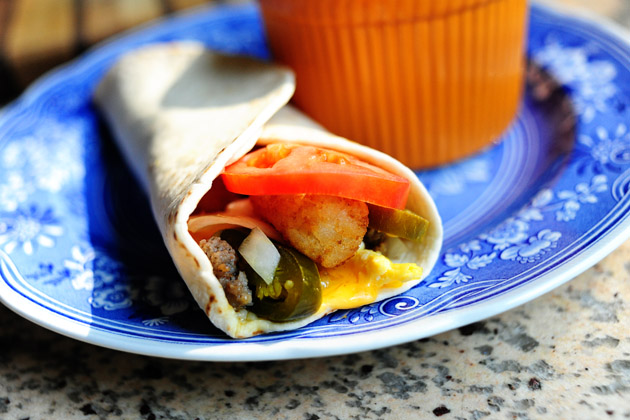
 The Pioneer Womans SuperSonic Breakfast Burrioto- yes please. My boys would love these.

And how cute are these? Happy Rainbow Cloud Cake pops?! 
And there is a book, Sweets on a Stick! 

And finally, my copy of the new Aussie mag SEAM arrived . What a lovely little mag.
Stunning pics and interesting people to read about. I think you will enjoy this, I am!

Have a lovely week,


Lisa x


Winners are Grinners at Crafty Mamas!

As our winners for the 2 x Ottobre Design Etsy shop vouchers ( each for 50 Euro) did not come forward, I have redrawn.

Our NEW winners are:

Sabine said...
Happy birthday Crafty Mamas!!! Thank you very much for being here :-) Love Sabine

Saturday, November 19, 2011

Ottobre Design Magazine Class 101. Part 2. Adding Seam Allowances


Let's look at  Ottobre Design  and adding seam allowance.

disclaimer again: no professional here, just a mum sewing at home!


Most European patterns will not include seam allowance. This holds true for Ottobre Design, Farbenmix, etc.  A common question on the Crafty Mamas forum, is

 “ what pattern pieces do I need to add seam allowance to?  

When it comes to Otto, always be sure to read the instructions completely before you begin,  often the cutting instructions for your pattern will list any particular instructions that are extra to the norm.

Ottobre Design  offer us this on their website...

The patterns include the necessary eases and hem allowances, but you always need to add 1 cm for seams. Any exceptions to this are stated separately.” ( told you so... read your instructions for your pattern ,clearly).

Sounds pretty simple, but it can get a little confusing when working with lots of pattern pieces!

Otto also tell us ( in the Instruction section) that...

  the patterns include hem allowance, button extensions and facing. When cutting out the garment pieces, add seam allowances of approx 1cm (depending on fabric) to each edge of the patterns".

So, we need to add a seam allowance to all the edges**, except our hems,. Otto include a small hem, I sometimes like to increase the depth. 

**Necklines. When constructing a garment with a neckline that is bound, it is not necessary to add a seam allowance to the neckline OR the neckline binding as it is already included.  This  also includes other bound areas ie;  t shirt sleeves, spaghetti straps style tops. 

If in doubt, always ask . You can email me with your pattern query and I will check for you. 

So, how to add the Seam Allowance?

If you do a search you will find folks are quite inventive when it comes to adding their seam allowance, and at what stage they add their seam allowance. I follow Otto’s advise and prefer to add the seam allowance at the cutting out stage. I prefer this as it allows me scope to adjust when cutting out. ie; some fabrics that are clingier, I might want to add more ease etc.

Some methods of adding seam allowance:

1.     Simply draw on with dressmakers chalk/texta/pencil  on the fabric , using a ruler all around the edge to measure your preferred seam allowance. 

2.       Just wing it, estimate as you cut- you dare devil you!  ( this is my preferred method!)

3.       Using an unthreaded wing tipped sewing machine needle


4.Using two pencils taped together


5.Rotary cutter with seam allowance guide attached.


6. Using carbon paper and a tracing wheel.


I guess it is just a matter of finding your fave method.


Adding Seam Allowance in action!


This is a favourite Otto issue , 2/2002. It is an oldie ( Non English) but a goodie. The t shirt pattern I have made before and loved. ( it also has a great spaghetti strap top too).

The fabric is one of the very cool ZNOKcotton/lycras. 

Here’s the pattern laid out....


Here’s my 1cm seam allowance being measured and added.
Note I have not added a seam allowance to the neck front or back.


Here’s my pattern pieces cut, ready to go. 


And here is my neckband, cut the recommended 4cm wide as per my pattern. I don’t cut the length yet, until I see how much recovery the fabric has. ( more in next tute). 


(and here is my bag of neckband  4cm strips, cut from scraps!)


Next tute we will look at..

*Symbols used in Otto patterns

 *T shirt- neckband construction , a simple neckband and neckline binding.

We will also have a chat about estimating the length of your neckband piece. 


Sunday, November 13, 2011

Crafty Mamas CRAFTY SUNDAY INSPIRATION

I have decided to start a new weekly series in my blog here, it will be, dear reader, simply...

CRAFTY SUNDAY INSPIRATION. 

Each Sunday I will simply post a few things that made me go "squeee"  this week,
a sharing of awsome-ness!


from Kristin Eldgridge Photograhpy
via Craft Gawker


A gorgeous Dotty Deer to make
 from Torie Jayne 
via Craft Gawker


From Ashley at Lil Boo Blue, 
 via Craft Gossip


 from Instructables


Happy Sunday

~Lisa 

Saturday, November 12, 2011

So I like to Embellish a little..is that wrong?

If you hang around the Crafty Mamas forum long enough, you will notice a similar trait among those of the Crafty Mama variety... we don't do plain very well, and quite often, can't leave well enough alone. 
It's not enough to create from scratch a gorgeous handmade design..we constantly feel the need to adorn our creations.We like to stencil, embroider, paint, applique, iron on, attach ribbon,labels, rip,tear, ...just to name a few of our vices.

So it's a jolly good thing the Crafty Mamas Shop has all you need, to allow you to tissy up to your hearts desire! 

 Crafty Mamas Iron Ons are often our weapon of choice when a quick fix is needed.
And why? They instantly elevate your handmade item from " Thanks Mum, another handmade tee.."  
too...
" That's AWESOME , Mum, can you make me another??!".


These arrived yesterday, and well, I'm Smitten. Who wouldn't be?!


**LOVE**


~Lisa~ 


About Me

Crafty Mamas SHOP blog. Aussie agent for Farbenmix, Studio Tantrum, Stenzo fabric, Ottobre design. Stocking Hilco fabric, Mamu design and other cool stuff!